This guide is to configure and setup RFIdeas Ethernet 241 controller for IP card reader solution to be used with Dispatcher Paragon Cloud.
The controller is a two-port switch that connects between a network device, such as a printer, and its network. Included USB and serial ports provide an interface to a wide variety of RFIDeas card readers. The controller can send badge data to the Dispatcher Paragon Cloud server which will use the badge data information to control the dispatching of jobs to the printer.
You can read more about the product please see – Ethernet 241 Controller
This how-to guide has 3 parts –
-
Prerequisites
-
Ethernet 241 Configuration
-
Dispatcher Paragon Cloud Configuration
Prerequisites
Get MAC address printed on the back of Ethernet 241. Use it to get IP address of controller from DHCP server in the network.
-
RFIDeas Ethernet 241 requires a RFIDeas pcProx card reader with part numbers ending in AK5
-
Dispatcher Paragon Cloud server version – 3.1 onward is installed and licensed
-
Verify Ethernet 241 controller is plugged-in to power supply and is connected to the network and is reachable on browser at
http://<ip address of Ethernet 241 controller>/index.htm -
Ethernet 241 controller is located next to printer/MFD where it will be used to release print jobs.
-
Verify compatible card reader is connected to the switchbridge on USB port and a test has been performed to ensure the reader is able to read the utilized ID cards. Confirmation that cards are read properly can be obtained from the Log tab available through the controller configuration web page. A successful card recognition entry will look similar to:
0.01:48:39.7 DEBUG Reader 1 Card Presented: Dec Id=33459, Hex Id=7082B3, Bits=24
Ethernet 241 controller configuration
You might have to logon to the controller if an admin password was configured previously
MAC Address – Take note of MAC Address of Card Reader. This will be used to configure Card Reader in Dispatcher Paragon Cloud. The MAC address is on the back of the Ethernet 241 controller and it also shown under the ‘Status’ tab of the Web UI
Open Ethernet 241 controller’s web page http://<ip address of controller>/index.htm
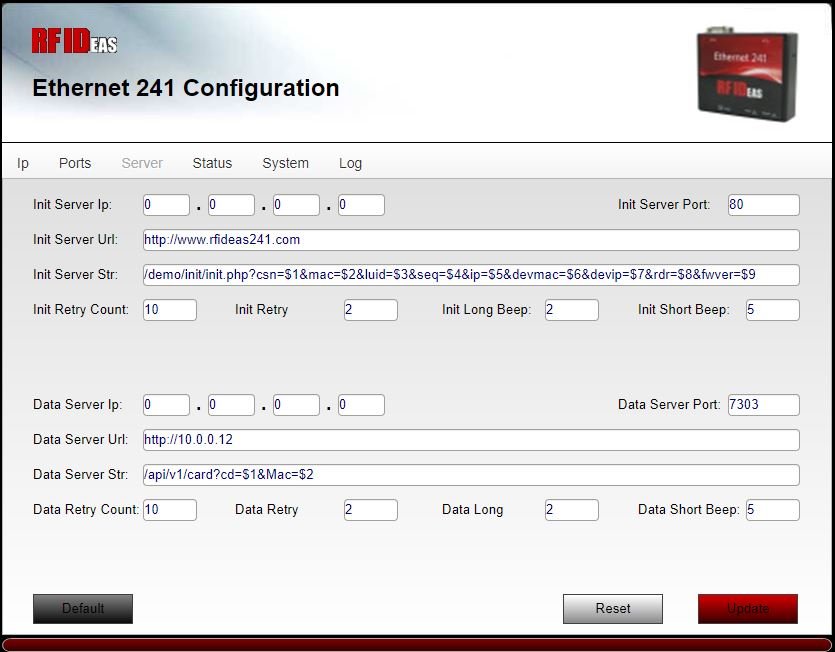
Go to Server tab to add following detail –
-
All settings that start with Init are not used and can be ignored.
-
Data Server Ip – this setting is not used. Leave it as default 0.0.0.0
-
Data Server Url – Add IP address of Dispatcher Paragon Cloud server as applicable in following format
https://<server-address>In case the communications should be non-encrypted replace the https prefix with http. -
Data Server Port – Port
7300can be used in case the communication between the controller and the server must be encrypted using HTTPs. For non-encrypted communication, port7303can be used
Please note: Not every RFIdeas 241 Card Reader may be HTTPs compatible. Please check with the manufacturer guidelines before setting up the data server ports.
-
Data Server Str – Add Dispatcher Paragon Cloud API path
/api/v1/card?cd=$1&Mac=$2
Note: no spaces should be added before, after or in this string or the reader will not be able to communicate with the server. -
The other four remaining settings can be ignored.
-
Select Update to save settings
Refer to below image for sample configuration settings
Dispatcher Paragon Cloud Configuration
-
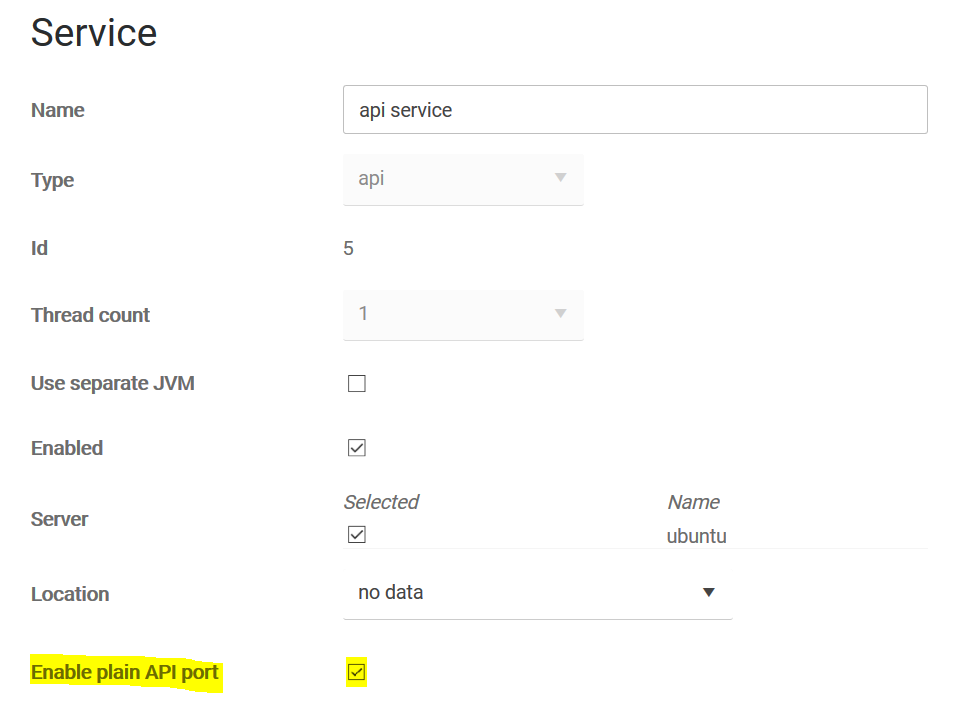
Edit Dispatcher Paragon Cloud API Service on primary/gateway as applicable to ‘Enable plain API port’ (optional – needed only if you want to use plain port)

-
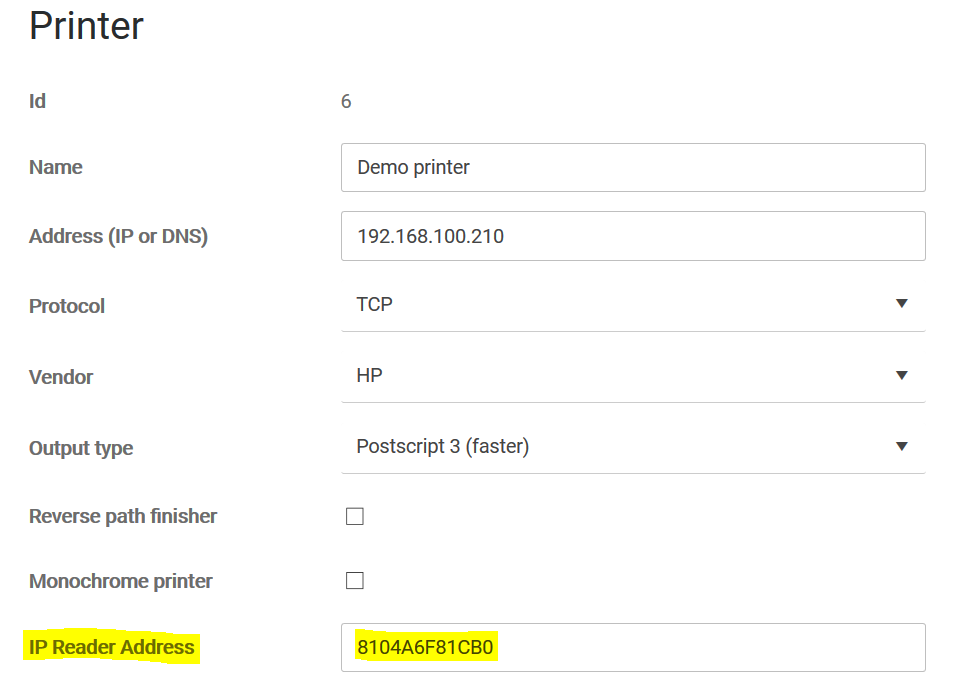
Edit Printer Settings in Dispatcher Paragon Cloud to add MAC ID of Ethernet 241 controller on Printer/MFD where ‘swipe-and-release’ feature has to be used

-
Enroll cards on available MFD to use that card with IP card reader solution. If its not a possibility, add Card ID to the user in Dispatcher Paragon Cloud using Dispatcher Paragon Cloud public API. Link to API documentation is here. Please note that you will need to read Card ID from the Reader if not already known. One way to do so is to open notepad application on computer and plug the reader into its USB port. Card ID of the reader will be printed on the notepad.