
Using the SAFEQ Cloud Chrome Extension
Prerequisites
- Your administrator has installed and configured the extension for you.
- To use SAFEQ Cloud Chrome extension, you must enable account synchronization in Chrome (see section Enabling account synchronization in Chrome of this page).
Logging in
- Click the extension icon in your browser.
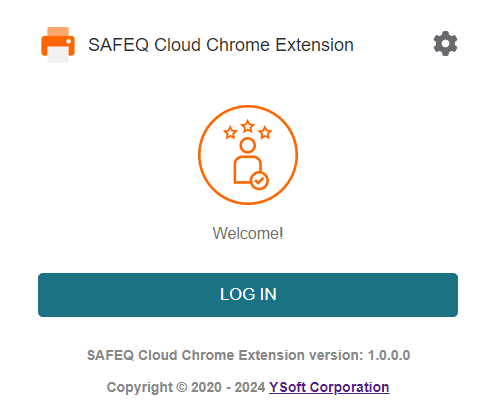
- Click Log in. A login dialogue window will open. You will have a choice to log in with Dispatcher Paragon Cloud username and password or with your Google account.
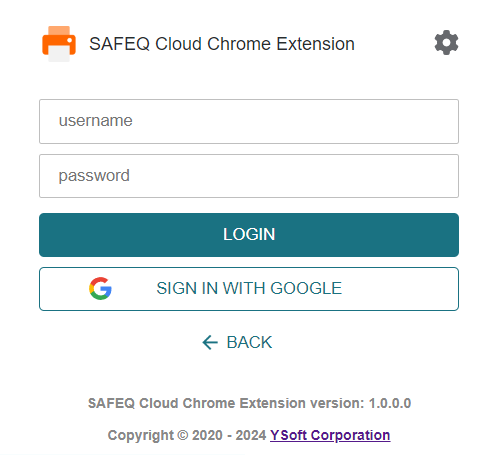
- Enter your username and password for Dispatcher Paragon Cloud and click Login.
- Alternatively, click Sign in with Google and enter your Google credentials.
Synchronizing printers
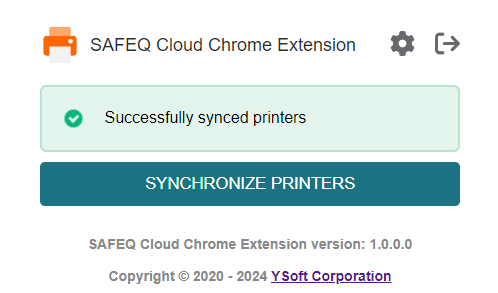
- Open the extension icon in your browser. A dialog window will appear.
- Printers are automatically synchronized by opening the extension popup window. To trigger the synchronization manually, click Synchronize printers.
- You will see the "Successfully synced printers" message.
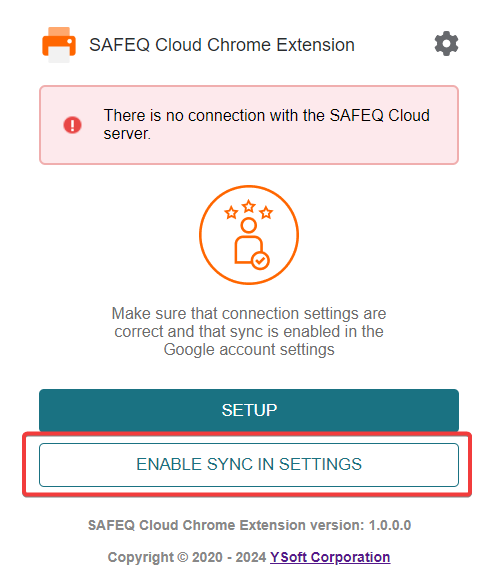
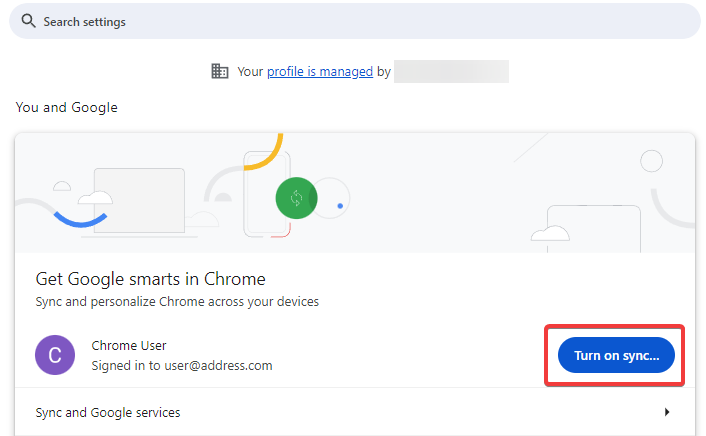
Enabling account synchronization in Chrome
- In your Chrome browser, go to chrome://settings/people or click the SAFEQ Cloud extension icon and then click Enable sync in settings.
- In the next dialog window, click Turn on sync...
- Click Yes, I'm in.
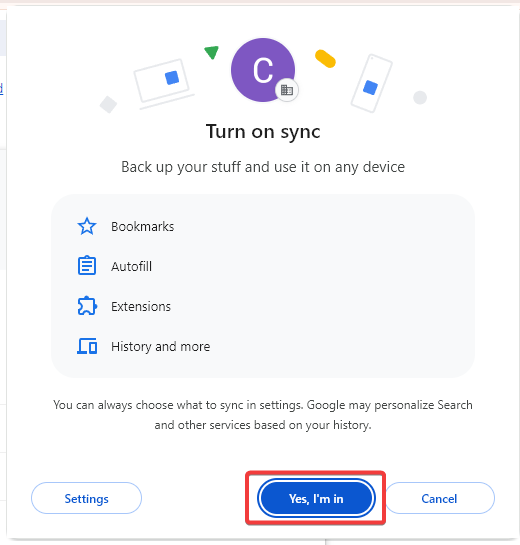
- After successful login, verify your configuration by clicking the extension icon. You should see the "Successfully synced printers" message.
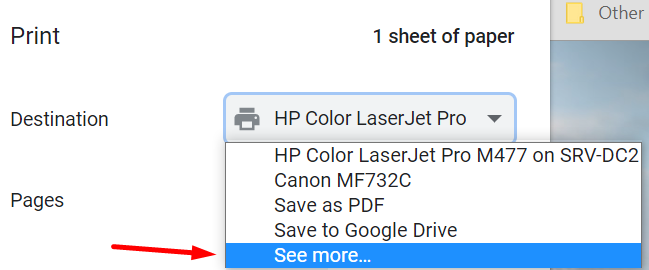
Submitting a print job
- Select a document for print.
- Open the Print dialogue in your Chrome browser.
- In Destination, click See more.
- Select a printer with the SAFEQ Cloud Chrome extension icon.
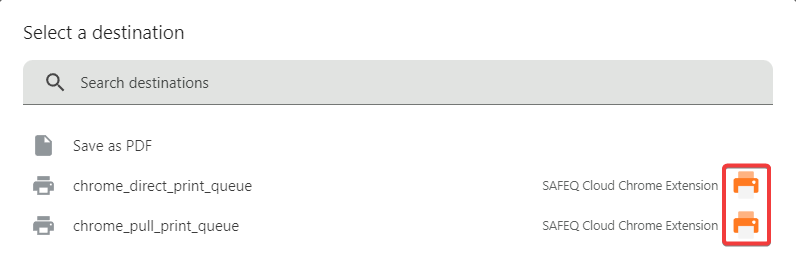
- Click Print.