
Brother cloud terminal is currently in closed beta and requires special pre-release firmware on the Brother device.
Prerequisites
Before configuring Brother Gen 2, make sure that:
-
Brother Gen 2 Cloud Terminal is enabled for the account.
-
The printer can communicate with the required Brother cloud services.
-
You have permissions to manage terminal configurations and output ports.
-
The MFP supports the Brother Solution Interface(BSI).
-
Firmware version, which allows running cloud terminal on Brother’s MFP.
If Brother Gen 2 is not visible in the terminal configuration, contact support or your administrator to enable the feature for the account.
Installing
Brother Gen 2 Cloud Terminal can be installed via Terminal Deployment Tool or manually.
Guide for instalation via Terminal Deployment Tool can be found here: Terminal Deployment Tool.
Manual installation:
-
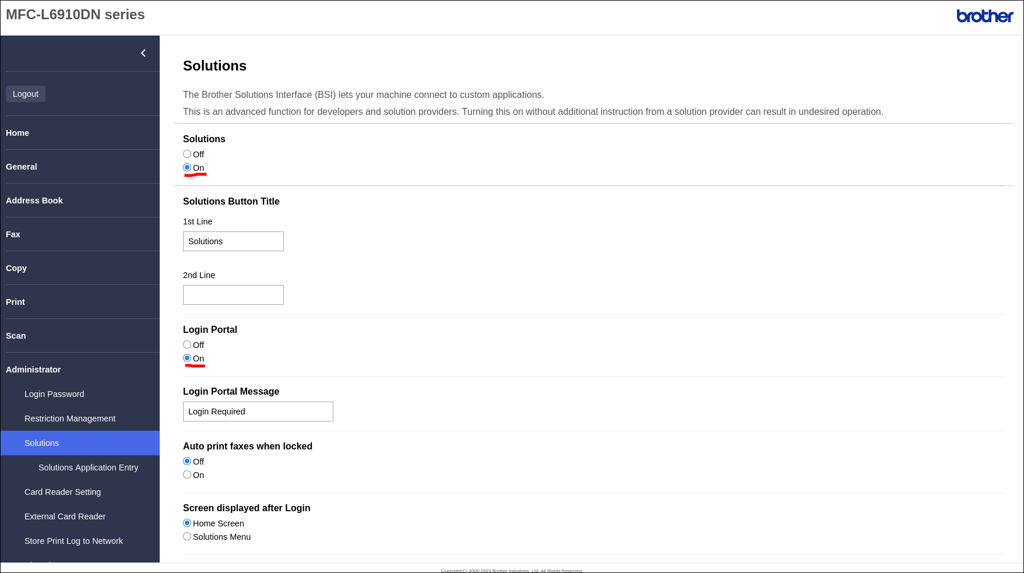
Make sure you have Solutions and Login Portal enabled.
-
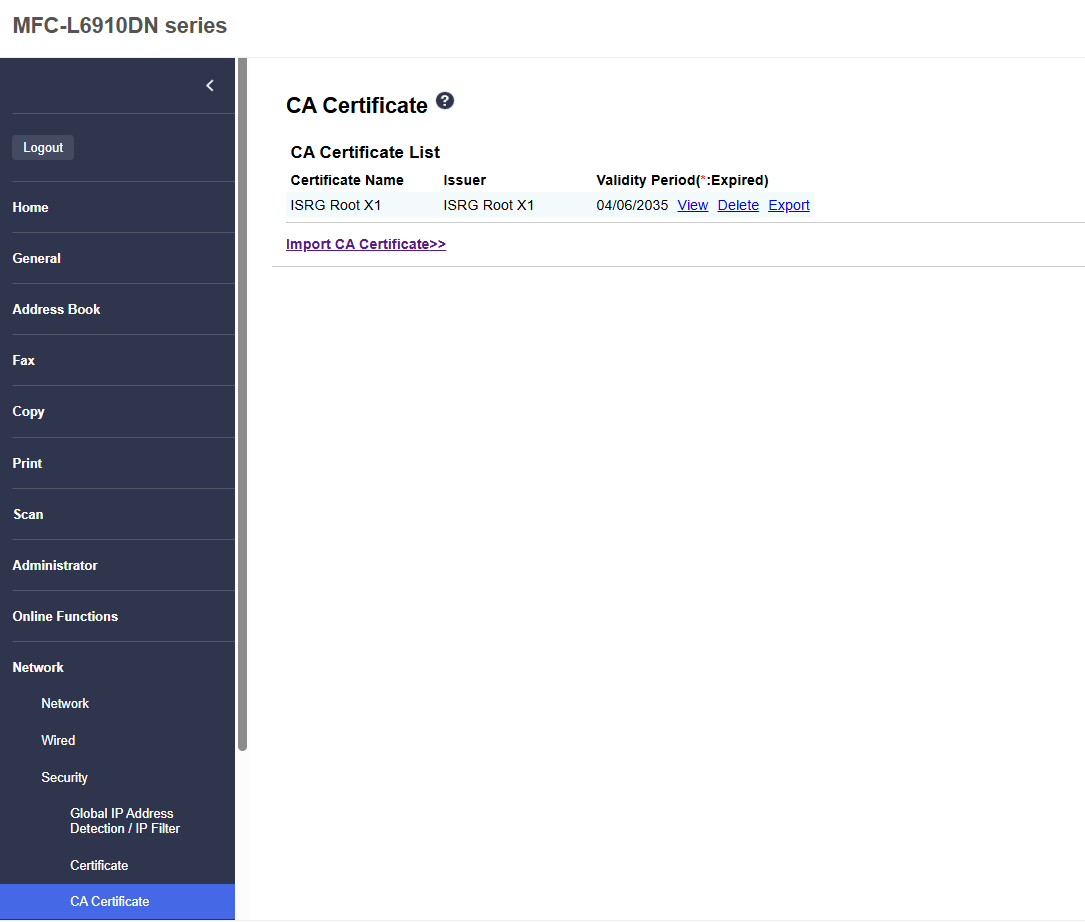
Add root CA certificate of your tenant.
-
Export certificate of your tenant.
-
Import to CA Certificate List
-
-
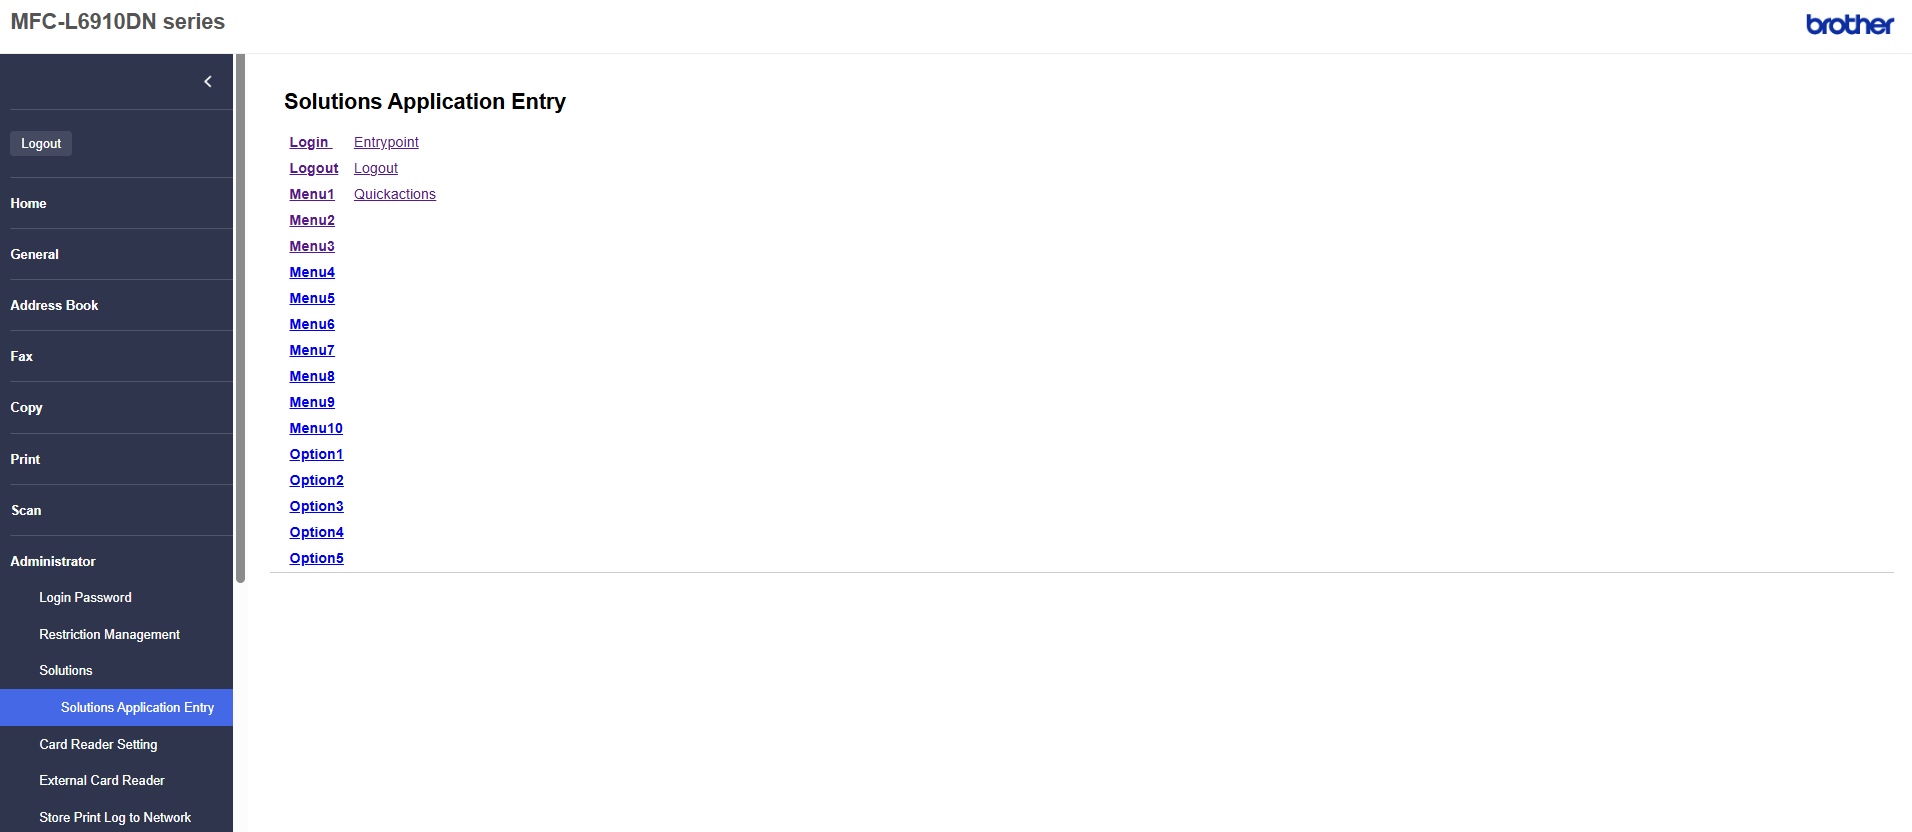
Set Solution Application entries
-
Login
ApplicationID: <does not matter for manual deployment>
URL: https://<your server url>/brother/entry-point
Argument: set of arguments separated by comma
API_KEY=<apikey> -
Logout
ApplicationID: <does not matter for manual deployment>
URL: https://<your server url>/brother/unlock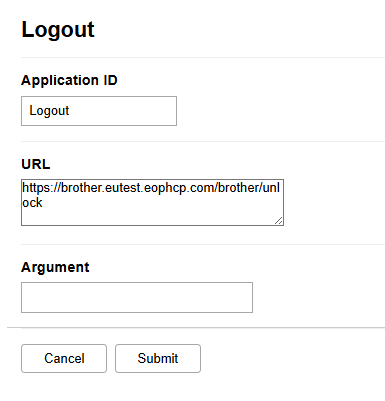
-
Menu1: Quickactions app
ApplicationID: <does not matter for manual deployment>
URL: https://<your server url>/brother/quickactions Argument: API_KEY=<apikey>
-
Registering the cloud terminal in SAFEQ Cloud Web UI
-
Upon installing the terminal, you will see a screen with the Serial Number of the device (prefixed with br_). Note down the ID number.
-
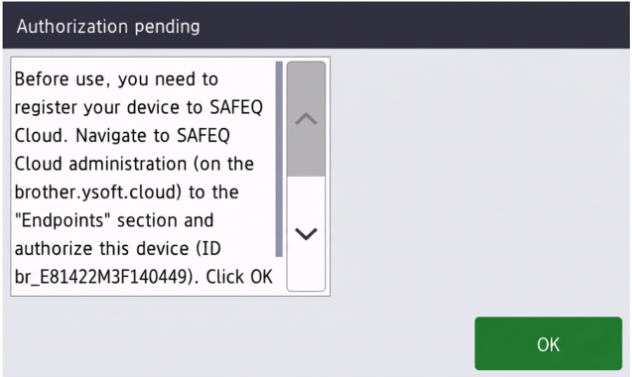
In SAFEQ Cloud web UI, go to Security > Endpoints and find the entry with ID number that you noted in the previous step. Select the entry and click Authorize selected.
-
On your MFP, click the “OK” button
-
The screen with authentication method selected in Embedded terminal template should be visible.
Card configuration
-
Based on you card reader, select either Internal NFC reader or USB card reader
-
Internal NFC reader can be used(should be set to Hexadecimal mode to read same as the Y Soft reader)
-
Internal NFC reader only works when no USB reader is connected
-
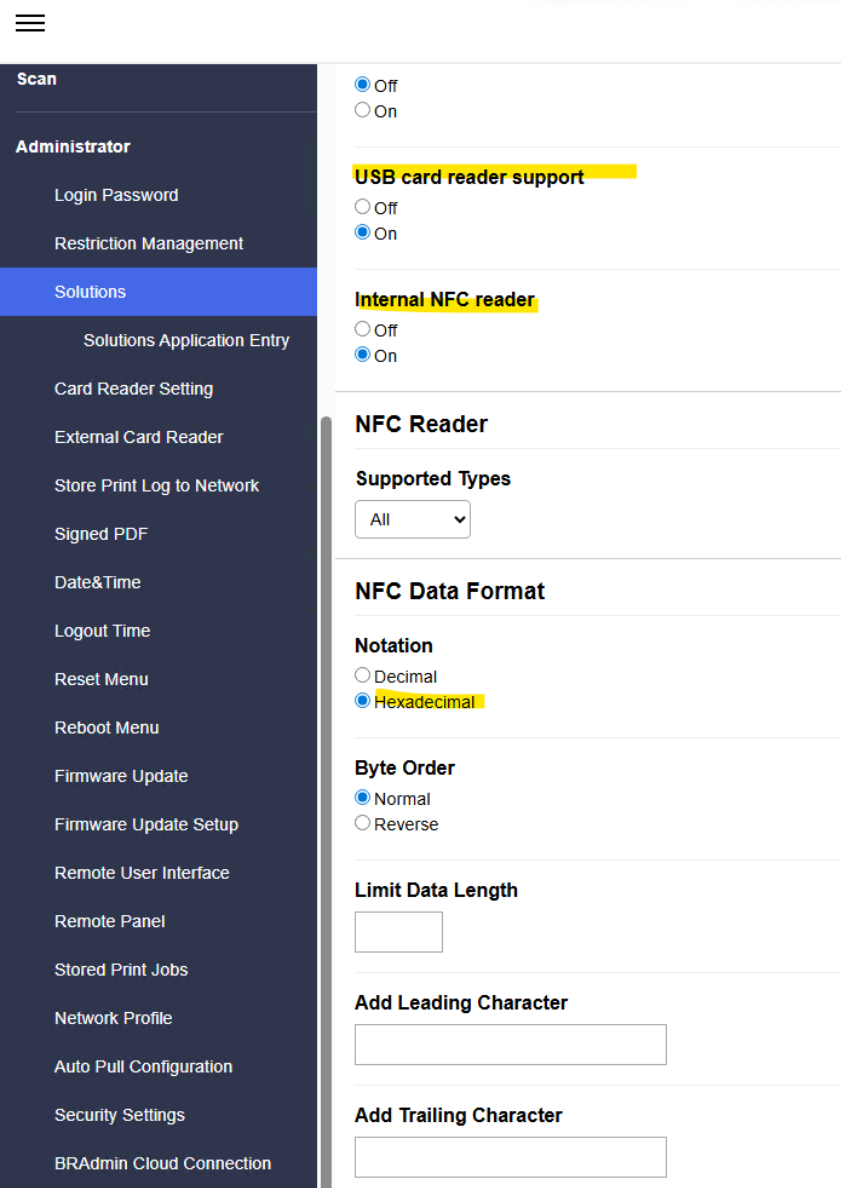
External card reader must be added to MFP whitelist or enable all external card readers
-
Limitations
Print
-
Currently only printing via local delivery is available
Authentication
-
Users cannot log out via their cards
-
Users cannot register their cards
Language
-
Lanugage switing is not supported by terminal app. The terminal app language follows the device language. To change it, go to the device's Restriction Management → Setting Lock Detail and enable Initial Setup. Then on the device go to Settings → Initial Setup → Language.
Troubleshooting
If Brother Gen 2 is not available in the application type list, the feature is probably not enabled for the account.
If install or uninstall buttons are not shown, this is expected. Brother Gen 2 uses manual operations instead of the classic embedded installation flow.
If the terminal configuration cannot be assigned to a printer, verify that the printer vendor is Brother and that the output port is configured correctly.
Error codes
Refer to the following chart to check and solve the error code displayed on the LCD of the Brother device
Customize login message
The printer has the option to customize the login message from the printer web page. Under Administrator -> Solutions you can change Login Portal Message to the message you want, the default english text is “Login Required”