
To synchronize groups from Auth0, you must create a group synchronization application in the Auth0 identity platform.
Creating a Regular Web Application in Auth0
-
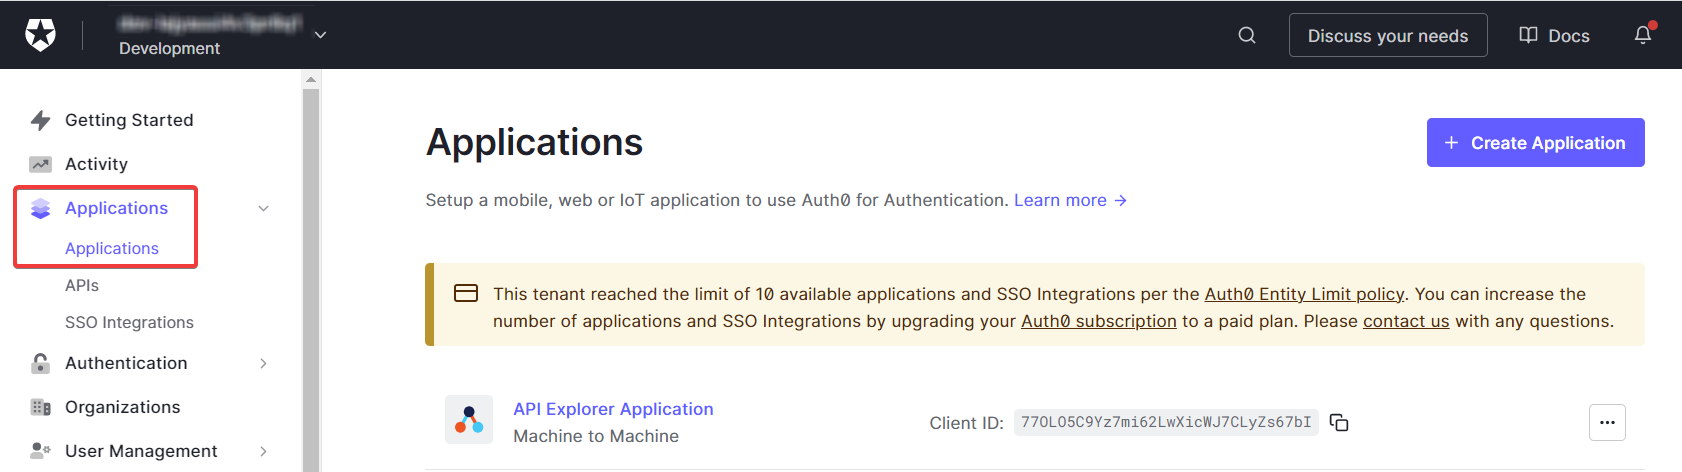
Log in to Auth0 identity platform and go to Applications > Applications.
-
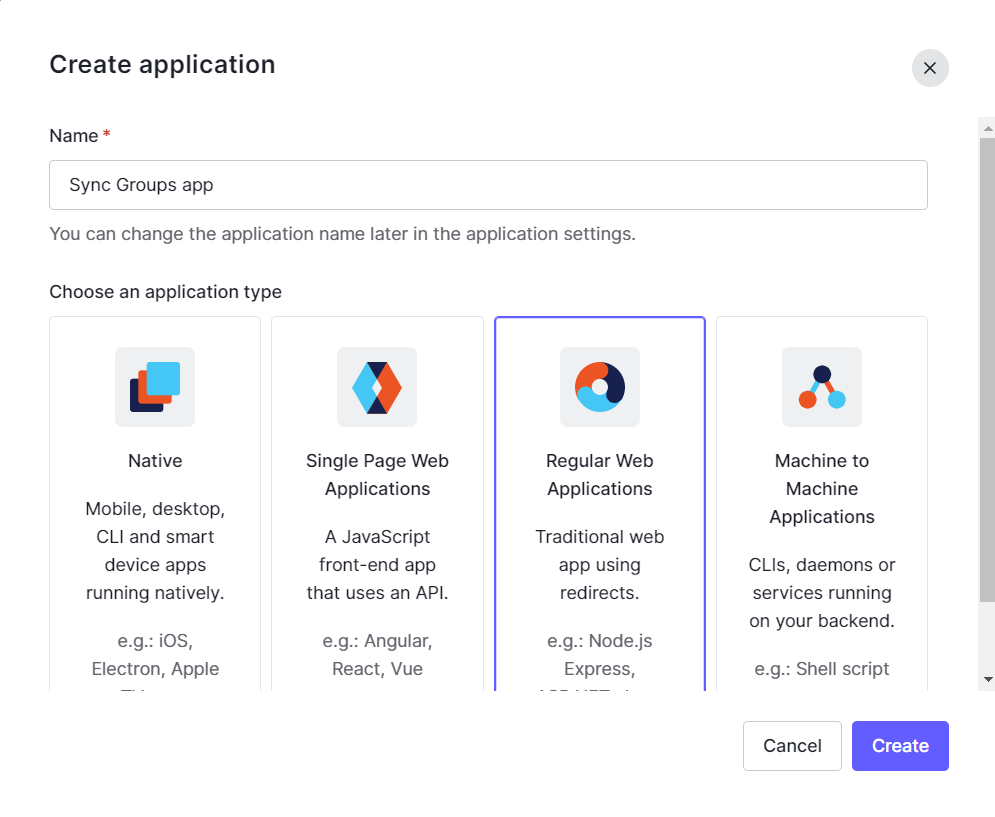
Click Create Application.
-
Enter the name of the application.
-
In Choose an application type, select Regular Web Applications.
-
Click Create.
-
Go to the Settings tab.
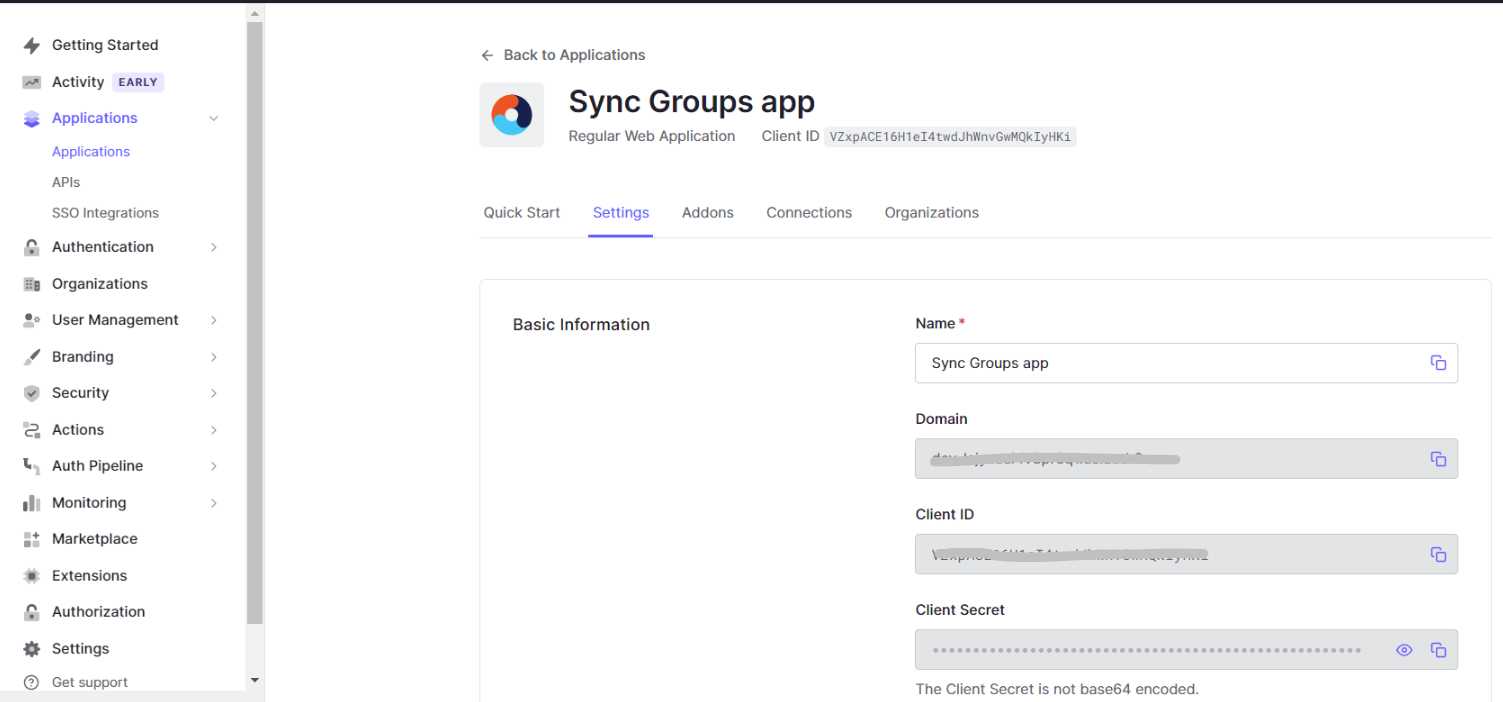
Domain – The domain used for authentication. This is common for all your applications.
Client ID – The ID of the application.
Client Secret– The client secret of the application. -
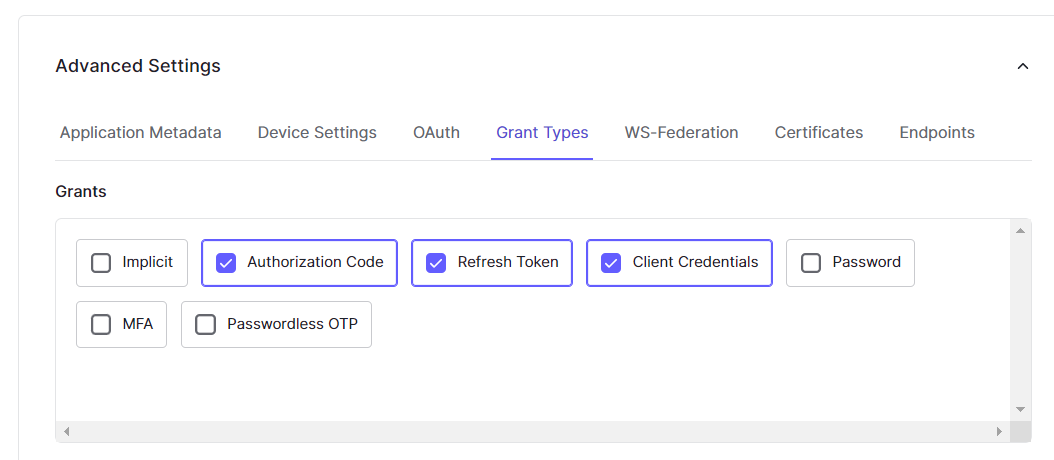
Go to Advanced settings > Grant Types.
-
Make sure that the following grants are selected:
-
Authorization Code
-
Refresh Token
-
Client Credentials
-
-
Go to Applications > APIs.

-
Select the API you want your newly created application to access.
-
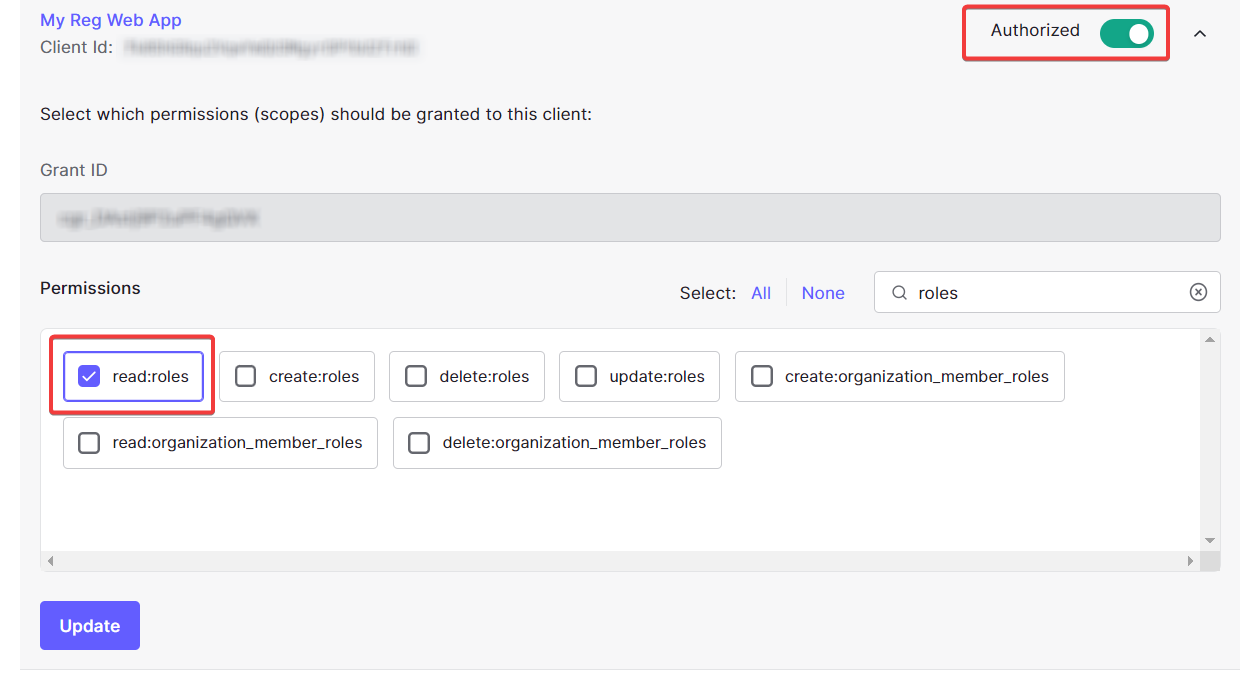
Go to to Machine to Machine Applications tab and find your newly created application. Authorize it, and in Permissions, select read:roles.
Adding user roles into the JWT token
For more information, see Auth0 documentation: https://auth0.com/docs/manage-users/access-control/sample-use-cases-actions-with-authorization#add-user-roles-to-tokens
-
In Auth0 Identity platform, go to Actions > Library > Custom.
-
Click Build Custom.
-
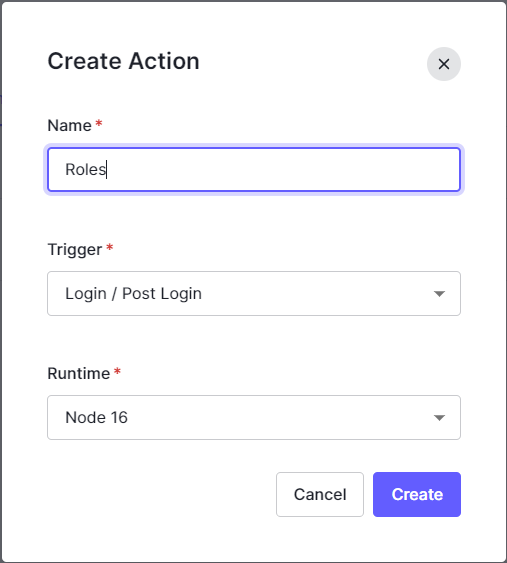
Enter the Action name.
-
In Trigger, select Login / Post Login.
-
In Runtime, select Node 16.
-
Click Create.
-
An editor will be displayed.
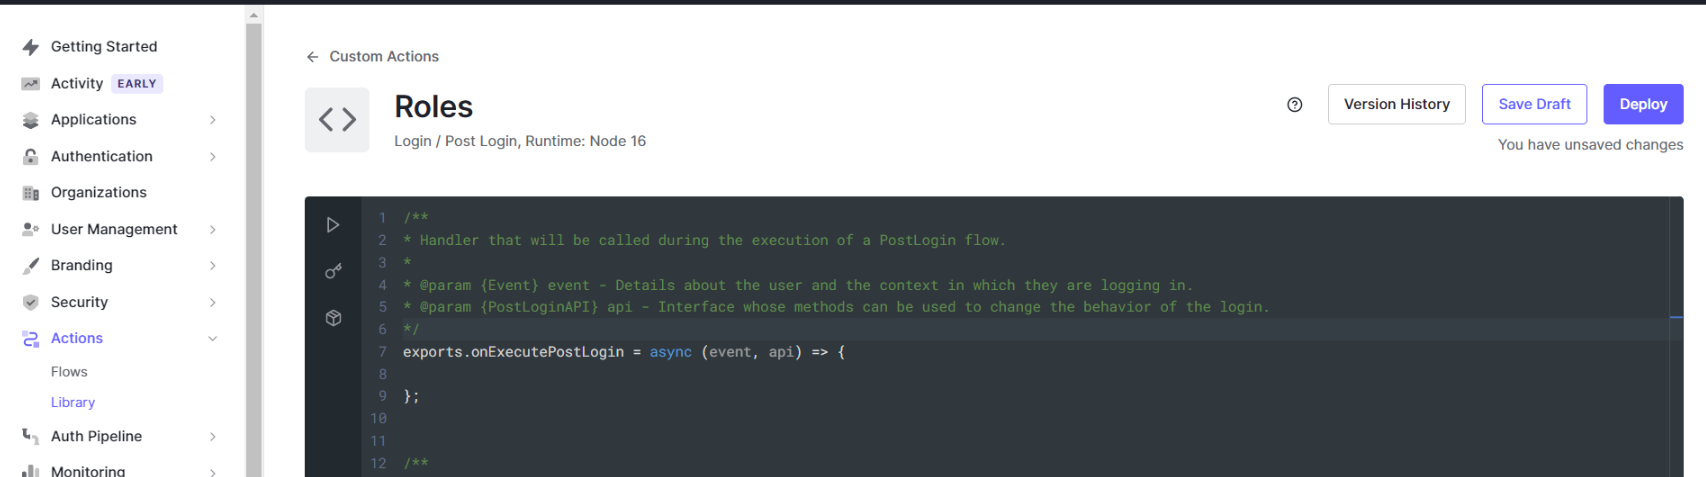
-
Paste the following block of code and click Deploy.
JavaScriptexports.onExecutePostLogin = async (event, api) => { const namespace = 'Dispatcher Paragon Cloud'; if (event.authorization) { api.idToken.setCustomClaim(`${namespace}/roles`, event.authorization.roles); api.accessToken.setCustomClaim(`${namespace}/roles`, event.authorization.roles); } }; -
Go to Actions > Flows > Login.
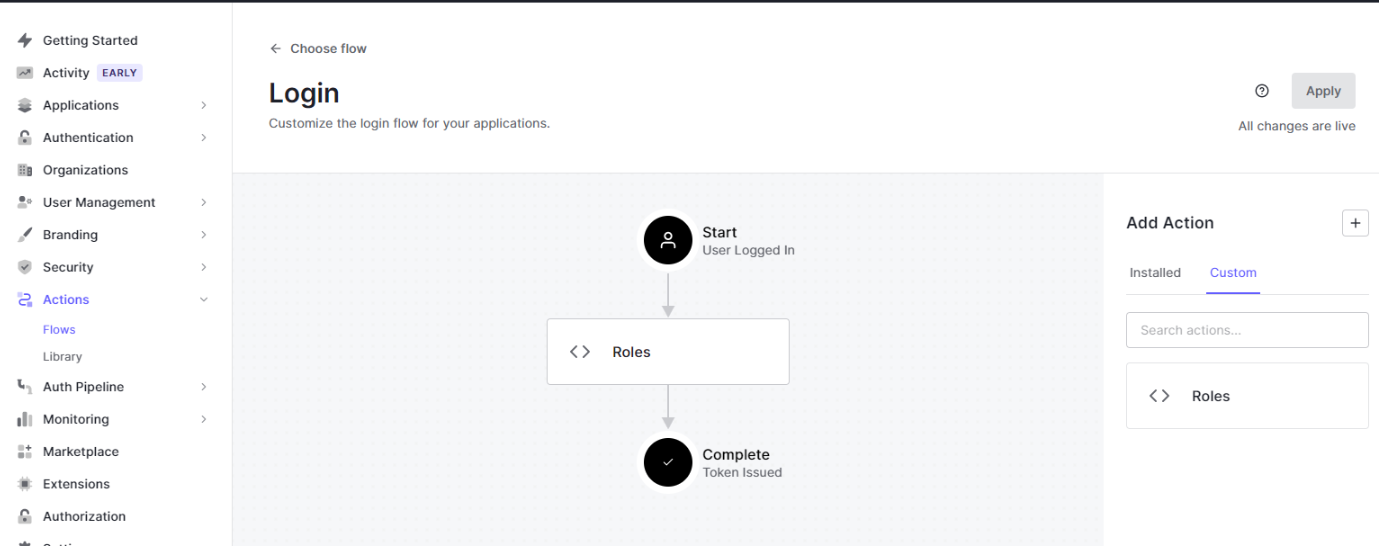
-
Drag and drop newly created Action to Login flow.
-
Click Apply.